Author: Ron Wen

  • Real Estate 101: Showing Your Home for a Sale, Step 9

    Maybe you’ve got a house, townhouse or condo. Maybe you’re selling first or maybe you’ve purchased a home and now need to sell your home. No matter what the scenario, the sale of your home is definitely one of the more stressful parts of the home-buying process! Depending on the condition of your space and how many denizens you have in your home, it will be different degrees of a challenge for you.

    First up, as part of the home selling process, you’ll usually have some photos taken of your home for the MLS listing. And it’s a bit of work to get there. You do a deep-cleaning, hide everything in the closet, in drawers or in cabinets. The goal is to remove most personal elements from your home and to make it as uncluttered as possible to show off the space. A stager may come in to add some knick-knacks and brighten up the photos. But once you’re done with the photos, you’ll have to be ready to show it in a similar condition. While you may show your home after moving out, for those of us who show their home while still occupying it, it’s a process!

    For the photos, things don’t have to be perfect. There can be blemishes, dust and dirt, stains and things are unlikely to show up in the photo or can be edited out. But when you’re showing your home for a real live person, everything will be reviewed up close and the place needs to be pretty spotless. They’ll open pantry doors, look into closets and imagine themselves living in your space. And you’ll need to keep your property in that pristine condition for probably at least a weekend (a hot market) up to many weeks. So how do you prepare to show your home?

    I’m assuming that you’ve done all the major repairs and touch-ups at this point and time. You’ve painted, caulked, and cleaned the basics in your space. I personally have a PODS storage container outside so half of my stuff is already in there for a de-cluttered space. Once you’re ready to show, it’s time to take it to the next level. Some things you’ll need to do in about an hour of time:

    1. Clear off all the counters. Move items into boxes and tuck into closets
    2. Clear all bath areas of personal belongings
    3. Clean/wipe down all kitchen, bathroom counters, sink basins to make them sparkle
    4. Clean/wipe down all windows and mirrors
    5. Clean/scrub hardwood, tile and linoleum floors
    6. Vacuum all rugs, floors to remove dust, dirt and hairs (don’t miss closets)
    7. Pull up all blinds, pull back curtains for good lighting
    8. Fluff-arrange pillows, remove-hide extra items hanging on walls, lying on the floors or on furniture (jackets, garbage cans, antennas, cables, desk accessories)
    9. Spray/deodorize home if needed, add potpourri (shoot for neutral-pleasant odor)
    10. Put out home marketing materials in welcome areas

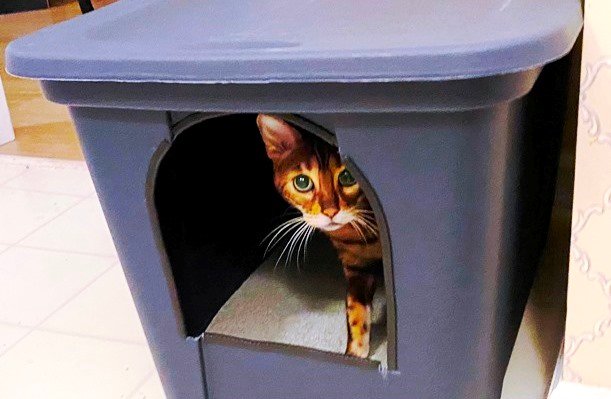
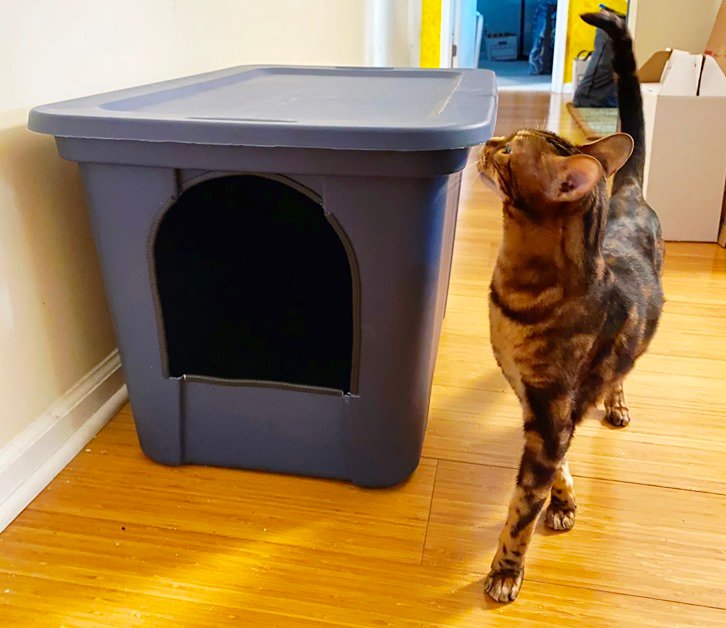
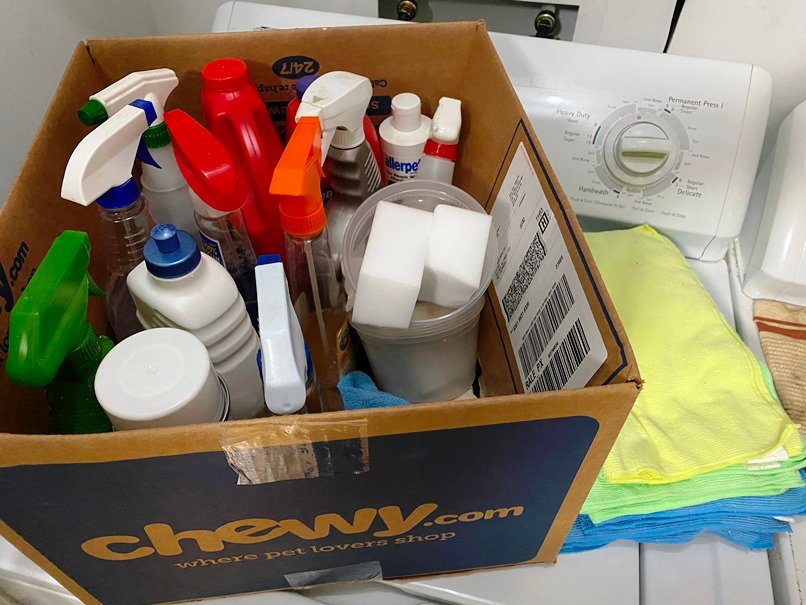
    At this point and time, you’ll have your place at what I call “99% clean” or about as far as you can realistically make your home look. It’s about where you’d be when having friends over, plus a bit more. You’re ready for the white glove test and it shows. To make this happen, I have my vacuum out at all times, a box of cleaning sprays and magic erasers along with a stack of micro-fiber towels. My condo showings have been from 10am to 6pm and I get a text-email whenever a showing is scheduled. Theoretically I may need to get out of the place in under and hour so you have to be READY to GO! I also have a cat so securing kitty in the carrier on the way out is part of the showing process.

    While it’s going to take you a bit of time to get your home in this condition before you start showing, you’ll have to maintain a 95% clean type condition for the rest of the time you’re showing. And that means you’ll have to KEEP your place mostly clean, in between showing days. It’ll most likely keeping to a fairly disciplined lifestyle that is a bit different than your normal day to day. And the more people and pets you have at home, the harder it will be, I keep the doors closed on a couple of rooms that I don’t want my cat roaming around in.

    When you get up on showing days, tidy the bed, put your clothes away in a box and smooth the comforter/bedspread for show. It also means making sure I’m showered by 9am and I keep an extra towel near by and wipe down all tile and fixtures before getting out. I try to actively use only one bathroom to minimize the mess. And all the bath-personal accessories I use go into a plastic tub for quick clean-up. I minimize the cooking I’m doing to keep the range grease-free and odors to a minimum, you may be doing a lot of take-out during your showing periods! Keep most of your food items in the cabinet, the pantry or anywhere else it can be hidden. Dishes, glasses and utensils should be stored in your dishwasher or stored away. I also keep a garbage box out by the door that I use to throw away items that need to get tossed on a regular basis. You don’t want a lot of wastebaskets in your home during showings, as you can guess, they won’t add any value!

    The goal is that once you get the text or email that a showing has been scheduled, you can get out as quick as a bunny. My goal is to get out fifteen minutes before a visitor might arrive which shortens down your time to prep and do some final cleaning. Typically it’s all about the kitchen and bathrooms since that’s usually where you’ll create your day to day mess. I do one last vacuum pass to pick up any dirt or hairs, use the hand-held nozzle vs. the roller which will just push debris around. On they way out, you’ll need to set up your realtor’s marketing kit. For me that’s a couple of plastic stands with information on what they should do while visiting along with masks, booties, a binder and information sheets for your home. Lock the place up and head on out for an hour and the viewing should be done.

    In the end, the showings are super important and you want to give the visitor the best impression of your home and have them imagine themselves living there. That means keep it clean, keep it neutral and keep it welcoming. Not an easy task when you’re still handling your life in the space. And while you could show your place once you move out, having a bit of furniture and belongings helps them visualize its potential. Just hang in there and hopefully you’ll get a call for an offer sometime soon!

  • Real Estate 101: Buying a Home, Tips and Advice for the Newbie

    In a previous post, I discussed the pros and cons of buying a home vs. renting. But if you’ve decided to purchase a home, how do you start the home-buying process? What decisions do you need to think through to prepare? And how do you get through the home purchase process with a reasonable amount of stress and speed? Unless you have an unlimited amount of money, you’re going to be dealing with everything first-hand so be prepared.

    So let’s start with this one fact: Buying and selling a home is one of the toughest experiences I’ve gone through as an adult. Understand that while it will certainly be a joyous process at the end when you pick up your key and move in, everything leading up to that point is fraught with uncertainty, doubts and lack of control. You’ll be at the mercy of the real estate market, what gets listed for sale, and your finances.

    And while the buy side of things can be stressful, I hate to tell you this but the sell side is even tougher! Unless you’re a first-time buyer or purchasing an investment property, you’ve probably got a home to sell. While an agent can be involved in both your buy and sell side of your real estate transaction, they don’t have to be. And some people actually try to sell their home by owner to try and save the real estate agent fees. There is definitely a lot to consider when selling your home!

    All in all, the home buying process is filled with with tons of emotion, math and decisions. Since I’m in the midst of the buy-sell real estate process, I’m going to try and outline some of the basics around this process, what to consider and to hopefully give you some insight to be prepared for what’s to happen, from one person to another.

    A couple of facts from my side to set context. I currently live in Raleigh, NC, a relatively hot, mid-sized real estate market and will be targeting a home to purchase in the $350k area (2,200+ sq feet) and will be selling a condo in the $300k area (1,140 sq ft). My goal is to buy a home first, have about 2 to 3 weeks overlap before selling my home for the move. While certainly there will be some differences from state to state, the basics should be pretty similar! And I’m offering this information not as a financial professional or realtor but as a fellow customer.

    I’m also assuming you’ve already done a significant amount of working saving up for a down-payment and cleaning up your credit score. Both of those goals take time before you should even start looking. So are you ready? You better be because for most people, buying their home is usually THE biggest purchase decision they will make in their life. More details below, I’ve ordered them somewhat chronologically and links will be added as posts are published. Let’s go!

    Key Real Estate Purchase and Sales ToDos

    1. Targeting a new home for purchase
    2. Timeline for buying a home and the down-payment
    3. Finding a mortgage, pre-approval and finances
    4. Picking an agent
    5. Searching for and visiting properties
    6. Offer – Price, closing date, due diligence, earnest money
    7. Due diligence, inspections and closing on your new home
    8. Selling your house
    9. Showing your home for sale
    10. Closing on the sale of your home

  • DIY 101: Make your own super jumbo litter box for your cat!

    DIY 101: Make your own super jumbo litter box for your cat!

    For all you cat lovers out there, do you find kitteh tends to make a bit of a mess in his kitty litter box? Mine does! I’ve got a longer Bengal cat who has a tough time fitting into even jumbo litter boxes which means he relieves himself standing up and you can guess how that can be bad news.

    So I looked around online and couldn’t find what I wanted. Then I started to figure out how I could DIY a super jumbo litter pan and voila! I think I found a great and affordable solution. Took me about 15 minutes to put together and I think it will last. Here’s how to do it!

    Items Needed for Super Jumbo Litter Box

    Edge trim from Amazon

    So the key to your super jumbo DIY litter box is a storage tote. You need something that’s long enough and tall enough so kitteh has some room to stretch out in! And also a tote that has the smoothest bottom-interior possible so you can scoop the litter out cleanly. Some totes will have ridges and dips on the bottom which is no bueno. Get the simplest and smoothest interior possible. My 30 gallon HDX tote from Home Depot is approximately 40″ long, 17.5″ high and 15″ wide, woo-hoo! I’d also suggest buying some edge trim which is often used to protect car doors. You can find it on Amazon and it should be able to clip onto a 1 mm edge in this use case.

    HDX 30 gallon tote

    Now that you’ve got your tote and edge trim, it’s time to get to work! I eye-balled most of my work here. About 5.5″ up, I marked off a line across the tote that was the width of my paper plate guide. Then near the top of the tote (about 11″ above horizontal marker line), I outlined a circle around the paper plate. And then drew vertical lines down to the horizontal marker line to complete the hole opening. You basically want to make sure the hole is high enough to keep litter in but big enough so your cat can easily enter-exit. These measurements are not exact and may need to be adjust for your cat size-length!

    Bear checking out his new litter box

    Using the box cutter, I carefully cut through the wall of the tote, bottom first, top-circle second and then the sides. My tote material was pretty thin so it cuts pretty easily! Then I cut the edge trim and covered each exposed edge as well as possible. I did not follow the little ridges on the front of this tote.

    Bear peeking out from his new super jumbo litter box.

    And voila, you’re pretty much done! I filled the super jumbo box with litter and within 30 minutes, my cat was in there and using the box. With the cover on top it should contain any liquids and provides a private spot for your cat. And it’s sturdy enough that I can put items on top of the super jumbo litter box. All the materials cost maybe $15 so it’s even a deal from a money perspective! So there you go, a DIY super jumbo litter box for kitty. I’ll report back after some months of usage to see how it holds up but I can tell you that the Bear seems to like it a LOT.

  • Real Estate 101: Renting vs. Buying a House, Insights and Thoughts

    Real Estate 101: Renting vs. Buying a House, Insights and Thoughts

    As someone who has lived in some expensive cities (Boston, San Francisco) and changed jobs a lot, I was a renter for a good chunk of my young adult life from 20 to 40. Part of it is the commitment to save up for a 10% or 20% down-payment, part of it was being a committed single person and wanting to enjoy yourself. Either way, there will likely be a time when you reach a point in life where you need to decide whether you want to rent or jump into the real estate market and buy.

    Here are some thoughts on the pros and cons of renting vs. buying that I’ve run into over the years!

    Renting Pros

    1. Mobility: You can usually break a lease pretty easily and move if needed for personal or professional reason.
    2. Newer amenities: In many areas, renting will allow for more modern features and options in your living space.
    3. Social options: Renting is usually in higher density situations so you’ll likely have neighbors and people to socialize with, date or build a community with. Not always but more options.
    4. Low maintenance: Your rent pays for maintenance so if anything breaks, a fix should be a phone call away. And no need to mow that lawn, clean a pool or weed the garden!
    5. Location: You can usually rent in better areas than you can buy! And for expensive cities, it may be your only reasonable option.

    Renting Cons

    1. Neighbors and noise: Often when you rent, you’re likely to have a neighbor above or below you in an apartment setting. Depending on who they are, it may be a problem.
    2. Decorating: Since you don’t own an apartment, you’re limited in the type of improvements you can make and decorating you can do. At the least, you will have to return the space to its original condition or get charged for it.
    3. Pets: Oftentimes there are breed limitations or size limitations and/or a pet fee. If you’ve got a furry buddy or want one, something to consider.
    4. No equity: You’ll pay a substantial amount over the years for rent and never build up equity or take advantage of real estate appreciation. In popular areas, renting means missing out on building up your personal assets and net worth.
    5. Space and storage: If you’re in a more traditional apartment situation, usually storage is limited and you’ll have shared common spaces. As you get older you’ll probably need more storage space and appreciate your own personal yard and lawn.

    House-owner Pros

    1. Asset appreciation: Once you buy a house, you can take advantage of real estate appreciation! Say you put 20% down on a $200,000 house ($40k) and the house appreciates 5% over the course of a year. Do the math and your $40k investment has now returned $10k in a single year. That’s about 25% for a physical asset which is pretty durn good! And a safe investment (usually) given it’s tied to physical property.
    2. Tax deduction: Your mortgage payments are usually mostly interest early on in the mortgage, maybe 65% of it! But all that interest is tax-deductible so you’ll get a percentage back come April 15. But in the end, that money probably ends up being used to pay your property taxes and/or property insurance.
    3. Consistent payments: With a mortgage you’ll know what your housing costs are from year to year. While most rental markets are somewhat controlled, you won’t risk your landlord jacking up the rent if you live in a highly desired area.
    4. Building equity: In addition to asset appreciation, as you pay down your mortgage you will build equity (money and ownership of your house) over time. Your mortgage payment will slowly pay down more of your principal (what you owe on house) vs interest over time. Equity which is accessible when you sell your house/property or through a home equity loan.
    5. Upgrades and Improvement: Unlike living in an apartment, you own the place and can decorate, paint and upgrade your space as you see fit. Just be aware that eventually you will probably resell your home and account for a future buyer!
    6. More space: If you’re starting a family, you’ll probably need 3 bedrooms or more which is tougher to find in a rental scenario. And a garage is crucial for storing all your extra gear and belongings.

    House-owner Cons

    1. Maintenance: Owning a house means you’re now responsible for some very expensive items that will need to be maintained. Your HVAC (heating-cooling), water heater, kitchen appliances, siding, gutters, driveway and roof all have pretty long life-spans but you need to put money aside for when they need to be replaced or serviced. And you may need to mow that lawn or maintain a garden!
    2. Property taxes and homeowners insurance: Depending on where you live they could be under 1% or as high as 2.5% of your assessed property value. You’ll also need to account for homeowners insurance on your house or condo. And if you don’t put down a 20% downpayment, you’ll also have to pay PMI, a mortgage insurance to protect your mortgage provider.
    3. Home Owners Association (HOA) fees and rules: Another expense that varies quite a bit and you’ll be subject to rules within your HOA community covering everything from paint color, maintaining your grounds and more. While there are some houses that are not part of an HOA, I think most newer developments fall under an HOA.
    4. Lack of mobility: Owning a house means you won’t be able to move easily or quickly, especially if you don’t live in a growing and desirable region. That means looking for and accepting a job in another area of the country will be a lot of work. And if you have to stay, it also means potentially limiting your career and social options.

    When all is said and done, there are no “right choices” between renting and owning. But as you grow older and start to make money and accumulate things, home ownership will likely be the better option. Your lifestyle changes over the decades and you’ll find that some areas are cheaper to rent in vs. some areas cheaper to own in. In the end if you live in an area where home values are appreciating and mortgage rates are low, you should certainly consider buying a home from an investment standpoint. Just make sure you’re saving for a good down-payment and have a high credit rating before you take the leap!


    When you’re ready to purchase a home, please check out my home buying tips – Buying a Home, Tips and Advice for a Newbie

  • DIY 101:  Plumbing Projects, Electrical Work and Fixing Appliances

    DIY 101: Plumbing Projects, Electrical Work and Fixing Appliances

    You know the old saying, “Measure twice, cut once”? Well my DIY saying is more like “Measure once, screw it up, cuss a bit, go back to Lowes-Home Depot, measure twice and cut once”. Over the past five years I’ve done a lot of DIY around my home, from plumbing to painting, changing out lock-sets and replacing lights. I’m pretty mechanically inclined so I’m usually not too afraid to tackle a home project but it’s not for everyone

    If you’re looking at DIY projects in your home, first take stock of your own skills and willingness to do the work. And in the back of your head, think through the risk if you screw something up. If you’re working on a guest bathroom or bedroom that doesn’t get used much, who care? But if you’re talking about your main bathroom or kitchen, any mistakes will throw your life off for a bit.

    YouTube favorites, bookmark your favorite DIY videos

    Next, review the process and get an understanding of what needs to be done from beginning to end. Google and YouTube are your friends here along with Home Depot and Lowes Home Improvement websites. These online resources should give you a ton of videos and How To’s to gauge whether or not you feel comfortable taking on the work. While these videos usually don’t tell the entire story, they should get you 80% of the way there and certainly give you an idea of what your odds for success are. Keep a bookmark folder for all the videos you find helpful because you don’t want to have to search for it again.

    Underside of bathroom sink

    Oftentimes, DIY work and parts have really specific names and descriptions that they layperson will not know off-hand. So I usually start with a Google search on the basics and then try to narrow down over time, what the specific item or activity is needed. Thankfully Google is pretty good at interpreting what you want to do, although you may have to go pages into the search result to find what you want. Once you know the specifics around your project, you can search on YouTube and elsewhere to find the help videos

    A lot of DIY work around the home will also have standards, basic consistent parts and measurements but they will often vary just a little bit to your custom situation. That’s what makes DIY work really tricky because your particular scenario will be just a little bit different than what they are covering on a How To video. You’d be shocked at how many variations there are to a sink plunger or drain cover or faucet. And you’ll have to adjust the instructions and guidance based on your home situation.

    While you’re reviewing videos and help articles, take note of any special tools that are required. As you age, you tend to accumulate tools over time but if there’s a specialty tool that’s pretty expensive, I would think twice about working a project. Rug stretchers, nail guns, air compressors, etc. If you’re doing a one time project and need expensive equipment you might want to think twice about taking it on. And make sure you have a reasonably stocked tool bag or kit with all the basics: screwdrivers, pliers, wrenches, wire-cutters, utility knife, electrical tape, plumbers putty, hammer, drill, bits, flashlight, work gloves and more.

    Wiring for dryer

    Two super important tools are your smartphone camera and tape measure. Take pictures of your project before, during the work and after to help document your work. It’ll help you record your progress if you repeat the work. You’ll also need detailed measurements for the size of any particular fixture and specific measurements in your installation to DIY your work. I have 3 or so tape measures including one in the car. So I’d suggest maybe getting a three-pack from Amazon. Photographing wiring is crucial because once you pull things apart, you will need the photo to bring everything back to where it was. Photographs from the hardware store will also help you decide if a replacement part will work or if it matches what you have at home. Thankfully most online stores will have detailed pictures of replacement parts and hardware so you can do a visual comparison just in case.

    Parts label for door lockset

    Speaking of smartphone cameras, if you’re doing work on appliances, take a picture of the manufacturer sticker or plate. You will likely need a part number or serial number to identify your appliance and any replacement parts. Go online and you’ll find support documents that will show you an exploded view and/or maintenance parts list. From there you can either Google the specific part number or find it on Amazon to purchase a replacement. Note that many appliances are manufactured as families (Frigidaire = Whirlpool for example) and one set of replacement parts will be useful across multiple brands. You might want to keep a folder of part number and serial number pictures you have in your home.

    Replacement heating element for Kenmore dryer

    As you disassemble things, keep the parts-screws-pieces in a plastic container or maybe on a towel. You’re less likely to lose a piece and you may be able to lay pieces out in a way that shows you how things were taken apart. Reference that smartphone picture when you need to put things back together.

    And the most important thing is to try and have fun while you’re doing your DIY project! Assume it’ll take 2 or 3 times as long as expected to give yourself some mental breathing room. Take on smaller projects to build your confidence and feel like you’ve got a handle on your capabilities before jumping into more serious projects. And certainly, keep your local handy-man on speed-dial just in case…